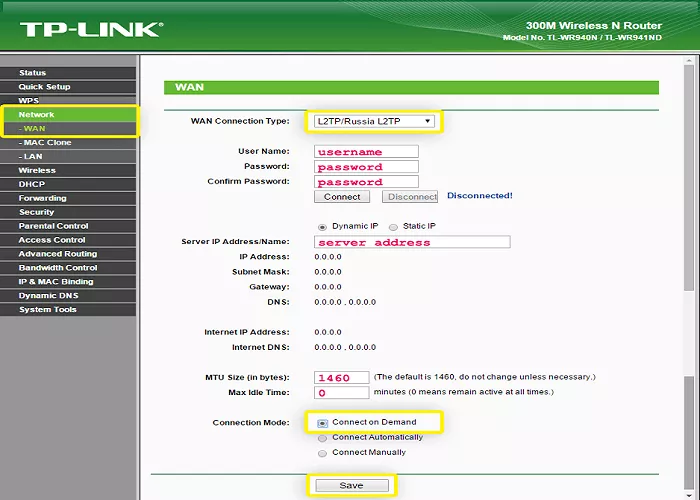
Setting up ExpressVPN on your TP-Link router ensures that all devices connected to your network benefit from enhanced privacy and security. This method protects devices that may not support VPN applications, such as smart TVs, gaming consoles, and IoT devices.
Benefits of Installing ExpressVPN on Your Router
- Comprehensive Coverage: Secures every device connected to your network without the need to install VPN software on each one.
- Unlimited Connections: By routing your entire network through a VPN, you can bypass device connection limits imposed by some VPN services.
- Protection for All Devices: Ensures that devices without native VPN support are still protected.
Prerequisites
Before proceeding, ensure the following:
- Compatible TP-Link Router: Verify that your TP-Link router supports VPN client functionality. Models like the TP-Link Archer series are typically compatible. You can check TP-Link’s official website for a list of supported models.
- ExpressVPN Subscription: An active ExpressVPN account.
- Basic Networking Knowledge: Familiarity with accessing and configuring your router’s settings.
Step-by-Step Guide to Setting Up ExpressVPN on Your TP-Link Router
1. Access Your Router’s Admin Panel
- Connect to Your Network: Ensure your computer is connected to the TP-Link router via Wi-Fi or Ethernet.
- Open a Web Browser: Launch your preferred web browser.
- Enter Router IP Address: Type http://tplinkwifi.net into the address bar and press Enter.
- Log In: Enter your router’s admin username and password. If you haven’t changed these, the default credentials are usually “admin” for both fields.
2. Update Router Firmware (If Necessary)
Some TP-Link routers may require a firmware update to support VPN client functionality.
- Navigate to Firmware Section: In the admin panel, go to the “System Tools” or “Firmware Upgrade” section.
- Check for Updates: Click on “Check for Updates” and follow the prompts to install any available firmware updates.
*Note: If your router’s firmware does not support VPN client features, consider upgrading to a model that does. *
3. Enable VPN Client Feature
- Access VPN Settings: In the admin panel, navigate to “Advanced” > “VPN Client”.
- Enable VPN Client: Check the box to enable the VPN client feature.
- Save Settings: Click “Save” to apply the changes.
4. Add ExpressVPN Server Details
- Obtain Configuration Files: Log in to your ExpressVPN account and download the OpenVPN configuration files for your desired server locations. These files typically have a .ovpn extension.
- Add New VPN Server:
- Click “Add” in the “Server List” section.
- In the “Description” field, enter a name for the server (e.g., “ExpressVPN New York”).
- Set “VPN Type” to “OpenVPN”.
- In the “Username” and “Password” fields, enter your ExpressVPN credentials.
- Click “Browse” to select the .ovpn configuration file you downloaded.
- Save Server Settings: After entering the details, click “Save”.
5. Assign Devices to Use the VPN
- Identify Connected Devices: In the “Device List” section, click “Add”.
- Select Devices: Check the boxes next to the devices you want to route through the VPN.
- Apply Changes: Click “OK” to assign the selected devices to the VPN connection.
6. Activate the VPN Connection
- Enable VPN Server: In the “Server List” section, toggle the switch to enable the VPN server you configured.
- Confirm Connection: The status should change to “Connected”.
Additional Tips
- Split Tunneling: If you wish to have some devices use the VPN while others connect directly to the internet, configure split tunneling in your router’s VPN settings.
- DNS Settings: Ensure that your router’s DNS settings are set to automatic or use ExpressVPN’s recommended DNS servers to prevent DNS leaks.
- Firmware Compatibility: Some TP-Link routers may have limitations with certain VPN protocols. If you encounter issues, consult TP-Link’s support resources or consider upgrading your router’s firmware.
Troubleshooting
- VPN Connection Issues: If devices assigned to the VPN cannot access the internet, verify that the VPN server is correctly configured and that your router’s firmware supports VPN client functionality.
- Device Assignment Problems: Ensure that the devices are correctly listed in the “Device List” and that the VPN server is enabled for those devices.
- Firmware Limitations: Some TP-Link router firmware versions may not support certain VPN features. Consider updating your firmware or contacting TP-Link support for assistance.
Conclusion
By setting up ExpressVPN on your TP-Link router, you can enhance the privacy and security of all devices connected to your network. This setup is especially useful for households or offices where multiple devices need protection but cannot individually run VPN software.
With the easy-to-follow steps outlined above, you can quickly configure your TP-Link router to secure your entire network. Whether you’re streaming content, gaming, or simply browsing the web, ExpressVPN ensures your online activities remain private and secure.

